Managing your Customers and Vendors (or suppliers) can be done in a number of ways. The first is to import them via the import feature discussed in this guide.
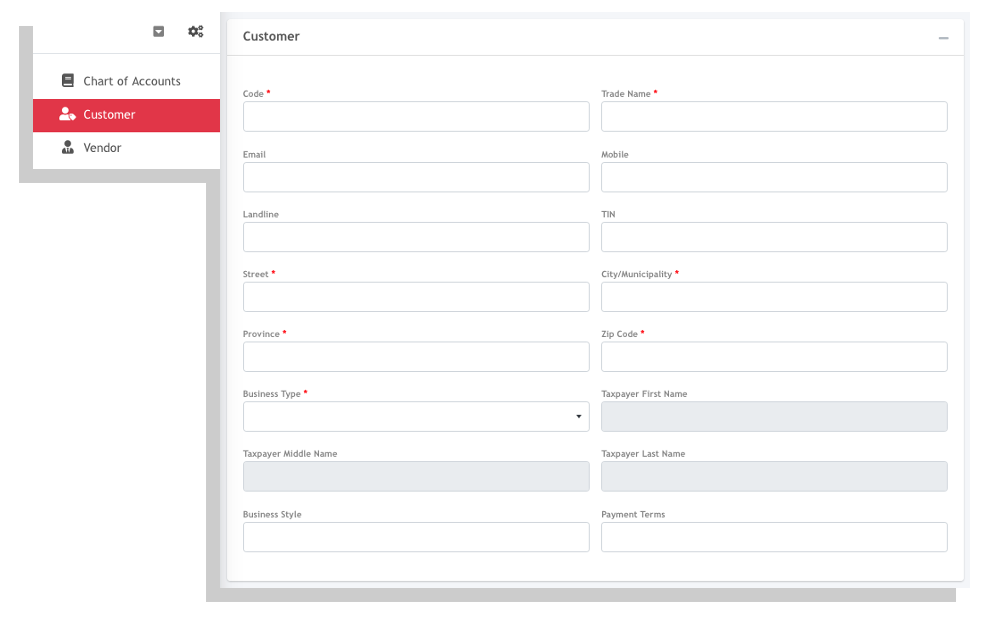
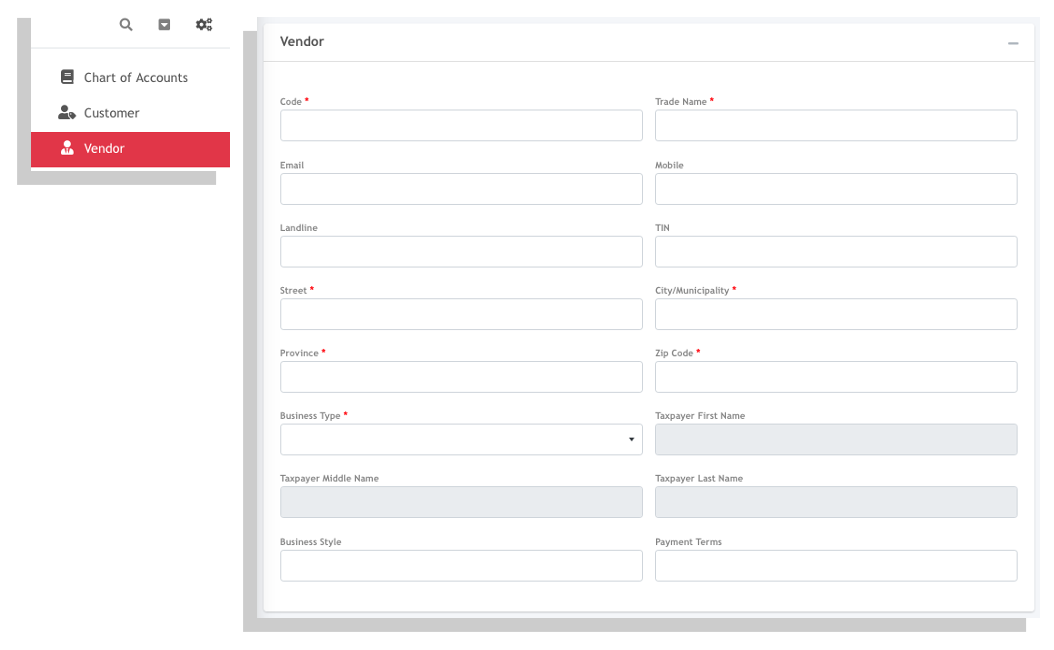
The second way to is to manually enter your customers via Settings where you can enter them one by one.
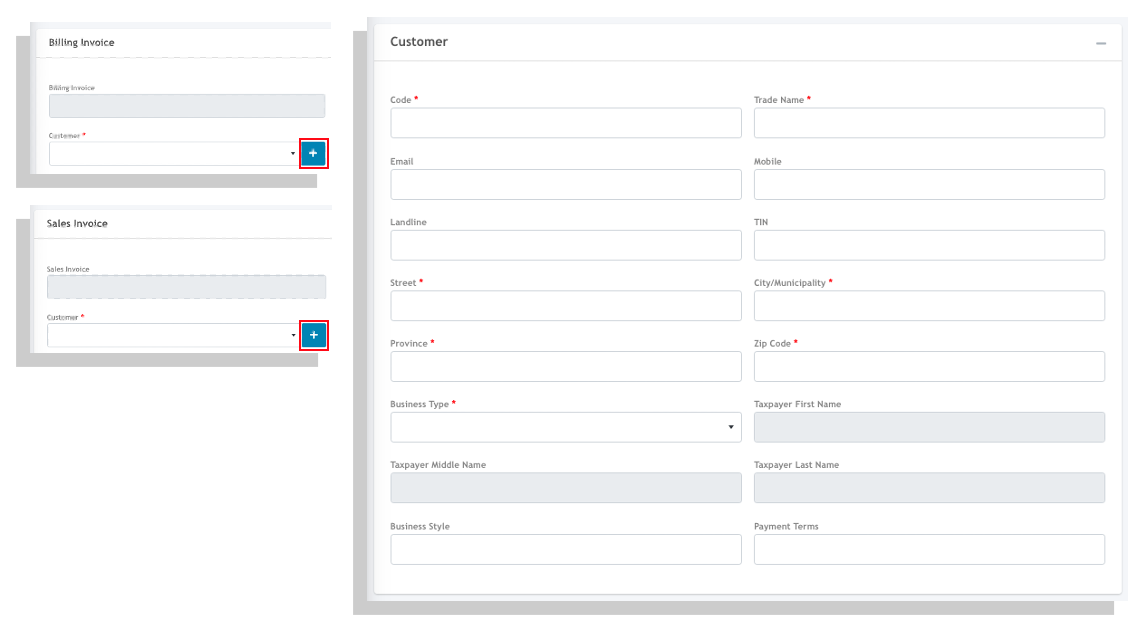
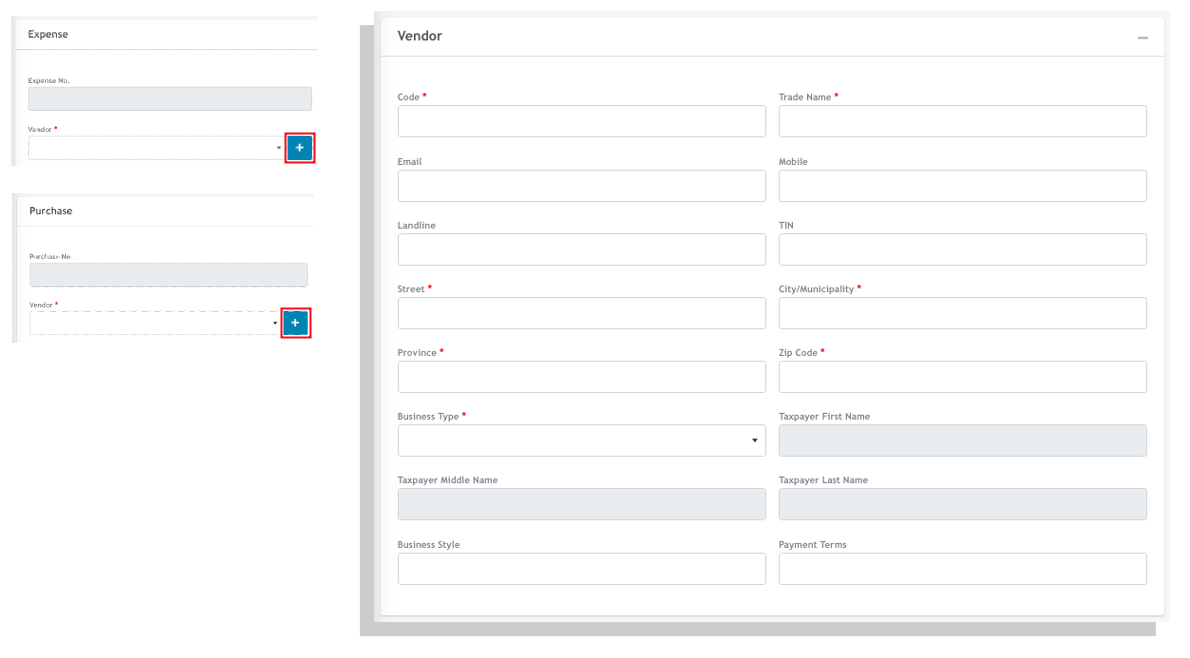
The third option allows you to add them on-the fly. While doing your transactions.
We will go through the second and third option in this guide.
1. Go to Settings and click on Customer 2. From the Customer list screen, you may filter your list by clicking on the All, Active or Inactive tab 3. You may export the list based on what is filtered on the screen 4. Click on the Export icon to export what is filtered on-screen 5. Click on Yes to confirm the export.
1. Go to Settings and click on Vendor 2. From the Vendor list screen, you may filter your list by clicking on the All, Active or Inactive tab 3. You may export the list based on what is filtered on the screen 4. Click on the Export icon to export what is filtered on-screen 5. Click on Yes to confirm the export.
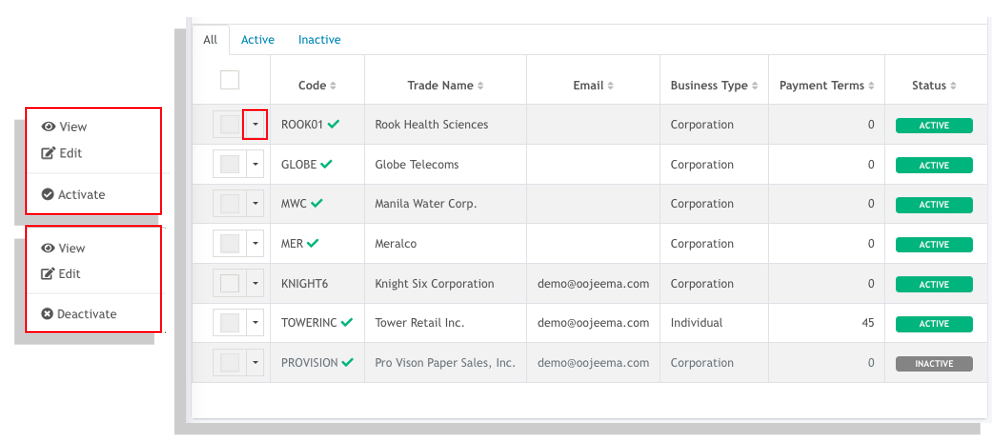
From the listing screen of both Customers and Vendors, you may notice a green check mark beside the name. This means that it has already been used in a transaction.
If you wish to remove a customer or a vendor from being used in a transaction. You may deactivate it from the listing screen.
To deactivate, click on the drop down button and click “Deactivate”.
To Activate, click on the drop down button and click “Activate”.